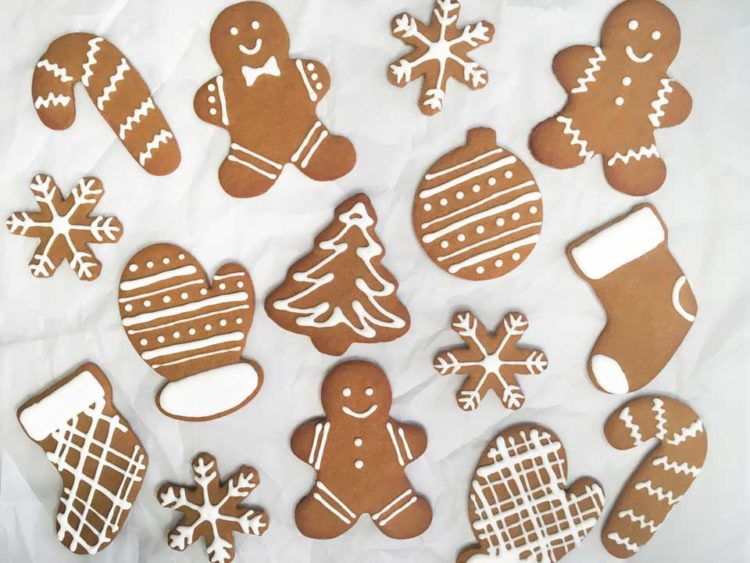
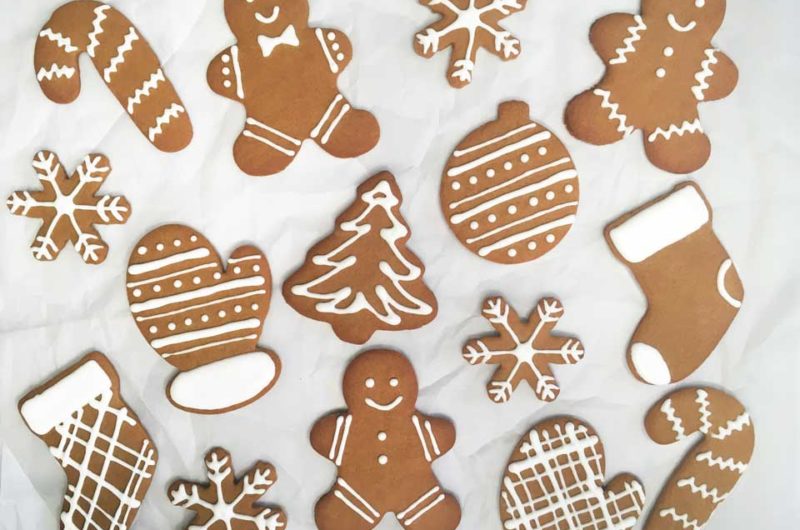
My mother made these Gingerbread Cookies every year at Christmas time. They are made with a nice blend of spices, ginger, cinnamon, nutmeg and cloves and are sweetened with molasses and brown sugar. These cookies are thin, crunchy and addicting!
A Holiday Tradition
I still uphold the Christmas tradition of making these cookies as well as many other types of cookies, like my Jan Hagel cookies. Joe and I pack them into decorative holiday tins and ship them around the country to our family and friends. Inevitably, everyone always ask for more gingerbread cookies! Now you can start the tradition of baking these yummy cookies each year too.
My mom didn’t bake a lot, but I do remember her baking a few things like Cookies at Christmas time, Hummingbird Cake when we had guests come over for dinner and Pumpkin Pie at Thanksgiving. My brother, sister and I would help roll out the gingerbread cookie dough and cut it into a variety of shapes, like gingerbread men, Christmas trees, stars and reindeer. Now I decorate them with royal icing, but when I was little we would decorate them with raisins. They are delicious with or without the icing. I just think they are prettier with the icing.
The History of Gingerbread Cookies
I always think of gingerbread as being a German cookie, but after researching, I found more examples. An early form of gingerbread can be traced to the ancient Greeks and Egyptians! They used it for ceremonial purposes. Later, other cultures discovered gingerbread as well. For instance in the 11th-century, the Crusaders brought ginger from the Middle East to Europe. An early European recipe for gingerbread contained ginger (of course), ground almonds, breadcrumbs, rosewater and sugar. They pressed the dough into molds that looked like the kings, queens or religious figures.
Eventually, the recipes came to include flour and eggs making a lighter cookie. Gingerbread houses became popular in Germany after the Brother Grimm published their fairy tales. German settlers brought the gingerbread house tradition to the United States where it is extremely popular to this day.
Gingerbread Cookies
10
dozen1
hour1
hour2
hoursThese Gingerbread Cookies are made with a nice blend of spices, ginger, cinnamon, nutmeg and cloves. They are thin, crunchy and addicting!
Ingredients
- Cookie Ingredients
4 3/4 cups flour, sifted
1 tsp baking powder
1 1/2 tsp salt
3/4 tsp baking soda
2 1/2 tsp ground ginger
2 1/2 tsp cinnamon
1 tsp nutmeg
3/4 tsp ground cloves
1 cup unsalted butter (2 sticks), at room temperature
1 cup light molasses
1 cup dark brown sugar, packed
1 large egg
- Royal Icing Ingredients
4 cups pure cane confectioners’ sugar, sifted
6 tbsp warm water
3 tbsp meringue powder
Directions
- To Make the Gingerbread Cookies
- Sift together flour, baking powder, salt, baking soda and spices into a medium bowl.
- Put the butter, molasses, and dark brown sugar in the bowl of an electric mixer fitted with the paddle attachment. Mix on medium speed until completely incorporated and fluffy, about 3 minutes. Scrape down the side of the bowl, as necessary. Add the egg and mix well to combine. Reduce the mixer speed to low, and gradually add the flour and spice mixture until just combined.
- Remove the dough from the mixer and wrap in plastic wrap. Chill the dough until it is stiff enough to roll, 1-2 hours.
- Preheat the oven to 350F. Roll out 1/8” inch thick on a lightly floured surface. Cut with your favorite cookie cutters. Place on a cookie sheet that has been lined with a silpat silicone liner or parchment paper.
- Bake the cookies for about 5-8 minutes. They should be just set and very lightly browned along the edges.
- Cool for a couple of minutes on the cookie sheet and then transfer to a rack to finish cooling. Decorate with royal icing or just eat them!
- To Make the Royal Icing
- Beat all the ingredients together until icing is fully incorporated (7-10 minutes at low speed with a heavy-duty stand mixer, 10-12 minutes at high speed with a hand-held mixer). Don’t overbeat the royal icing. This will incorporate too much air, which will create bubbles.
- To thin the frosting, add 1/2 teaspoon water at a time until you reach proper consistency. (If you make it too thin, add a little powdered sugar to thicken it.) Use a grease-free spoon or spatula to stir slowly. Use a flat utensil like a small angled or straight silicone spatula to mix in a figure 8 motion. Avoid beating or mixing vigorously. You want the icing to be a thin consistency for decorating the gingerbread.
- Move to grease free bowls and add gel food coloring if desired (Don’t use liquid food coloring. It will change the consistency of the icing.) Fill grease free piping bags (I use disposable ones) fitted with a tip number 2 or 1. Decorate your cookies, as desired.
ROyal IcinG Tips
- 10 Second Test: To check for correct thin consistency for flooding, take some icing on a spatula and drop it back down into the bowl. If it sinks after a full count of 10, then the consistency is thin enough for flooding. Storage: Store royal icing in an airtight container at room temperature for up to two weeks. Before reusing, re-whip using a paddle attachment on low speed until its back to the correct consistency.
- Use grease-free tools: Keep all icing utensils and bowls completely grease-free for proper icing consistency and to ensure the icing properly sets. You can do this by washing everything with hot, soapy water. You can also boil your tips, couplers and spatulas for a few minutes. Don’t use plastic containers or piping bags if you have filled them with anything besides royal icing in the past. Any grease will cause the icing to not set properly.
- Cover with a damp towel: When not using your bag and tip, cover the tip with a damp towel to prevent the royal icing from drying.